Let's Build an Amphetamine Clone with Electron
Amphetamine is a popular Mac app that does one thing and one thing well - it keeps your laptop awake! For this project, we are going to build a simple Amphetamine clone that we can run on our own laptop using Electron.
I am going to be tackling this project in 2 parts: first, we will build a very simple tray application that has the core Amphetamine functionality of preventing your laptop from falling asleep. Here is what this will look like:


Then, once we have that working, we will implement an actual browser window based application that we can customize to add things like user input to extend the session, and a real-time countdown timer.
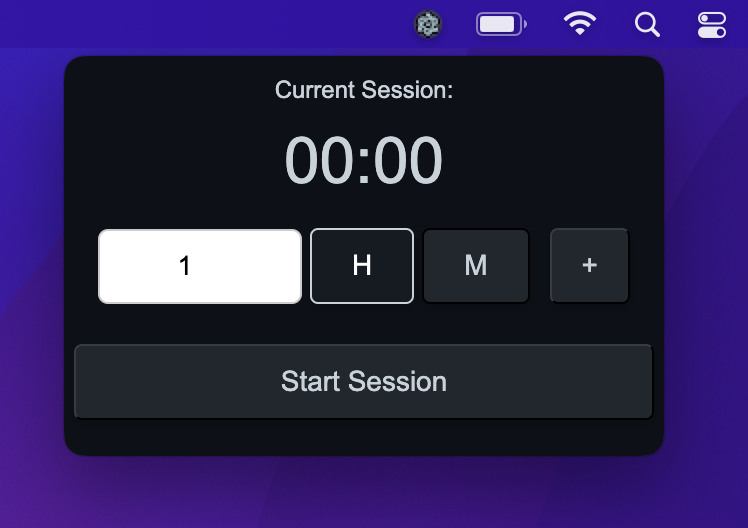
By the end of this project we will have a simple but functional electron app that you can run on your laptop to prevent it from falling asleep. Here's a quick preview of what we will be building:
The main goal of this project is to improve my understanding of building desktop apps with electron. If you enjoy this project, consider downloading the actual Amphetamine app, which is a great app with many more useful features.
Let’s get started!
Setting Up the Environment
Before we begin, ensure you have Node.js installed on your system, as Electron apps are built on top of Node.js. You can download it from nodejs.org.
Once Node.js is installed, we'll set up our project:
- 1. Create a new directory for your project and navigate into it.
- 2. Initialize a new Node.js project: Run
npm init -yin your project directory. This command creates apackage.jsonfile with default values. - 3. Install Electron: Run
npm install electron --save-dev.
Basic Project Structure
Here is a simple structure for our project:
/*

- main.js             (The main script that runs the main process)
- package.json        (Node.js configuration file)
- package-lock.json   (Lock file for the dependencies)
- icon.png            (The icon for our tray app, we will add this later)
*/
Setting up Main.js
The main.js file is the entry point of our Electron application. It will create the application window and manage the system tray icon. Here's a basic setup:
Let’s start by requiring in the app, tray and Menu modules from Electron
// main.js

const { app, Tray, Menu } = require('electron');
I also want to define a few variables that we will use momentarily. tray will a variable we assign to a new instance of Tray when we start our app, sessionActive will be used to determine whether or not a session is active, and sessionEndTime will be used to track when an active session will end.
// main.js

const { app, Tray, Menu } = require('electron');
let tray;
let sessionActive = false;
let sessionEndTime;
Now, when we start up our app, I want to create a new Tray instance, which will add our app to the top menu bar. To do this, we can add code to create a new Tray instance into app.whenReady, which will get called when electron initializes.
All we need to do is pass in the path to an image file that we want to use as our tray app icon:
// main.js

app.whenReady().then(() => {
  tray = new Tray('icon.png');
});
Note that the icon.png file needs to be added into our directory at this point to use as our app icon. This file needs to be the correct size (e.g. 16x16); if it is too large you will not see it in the tray menu bar when you start your app. Here is the image I'm using for my icon:
And again here is what my file structure looks like at this point:
/*

- main.js           (The main script that runs the main process)
- package.json      (Node.js configuration file)
- package-lock.json (Lock file for the dependencies)
- icon.png          (The icon for our tray app)

*/
updateTrayMenu
Now let’s define an updateTrayMenu function that we can also call in the app.whenReady code above to build a menu for our Tray app.
For this function, I want to define a menuTemplate that we can use to update our tray app.
We will use a method from Electron's Menu module we included above to build our menu template, and then we can use
a method from the Tray module to set the menu.
The menu we want to use will depend on the current session state; either a session is active or a session is not active. We will be able to determine this using our sessionActive variable from above.
If a session is active, the menu should include information about the time left in the session.
Otherwise, the menu should include an option to start a new session.
Here is the basic version of what my update tray menu function looks like:
//main.js

function updateTrayMenu() {
  let menuTemplate;

  if (sessionActive) {
    menuTemplate = [{ label: `Time Left:`, enabled: false }];
  } else {
    menuTemplate = [{ label: 'Start New Session' }];
  }

	// build menu from template
  const contextMenu = Menu.buildFromTemplate(menuTemplate);
	//set context menu
  tray.setContextMenu(contextMenu);
}
Now let's update our app.whenReady function to call updateTrayMenu when the app starts:
// main.js

app.whenReady().then(() => {
  tray = new Tray('icon.png');
  updateTrayMenu();
});
And here is what my full main.js file looks like so far:
// main.js

const { app, Tray, Menu } = require('electron');
let tray;
let sessionActive = false;
let sessionEndTime;

function updateTrayMenu() {
  let menuTemplate;

  if (sessionActive) {
    menuTemplate = [{ label: `Time Left:`, enabled: false }];
  } else {
    menuTemplate = [{ label: 'Start New Session' }];
  }

  const contextMenu = Menu.buildFromTemplate(menuTemplate);
  tray.setContextMenu(contextMenu);
}

app.whenReady().then(() => {
  tray = new Tray('icon.png');
  updateTrayMenu();
});
At this point, we should be able to run the application by running npm start. If everything is working, you should see your icon in the top menu bar in your Macbook, and when you click the icon you should see a selectable field that says “Start New Session”

powerSaveBlocker
Now we are ready to implement the core logic of our app - starting a new “session” that keeps the laptop awake. To achieve this, we can use a module electron makes available to us, powerSaveBlocker. This module includes a simple command we can call to prevent the laptop display from going to sleep. To do this, I am going to import the powerSaveBlocker module from Electron, and define a new variable in our app, powerSaveId, which we will use to track the id of the active session:
//main.js

const { app, Tray, Menu, powerSaveBlocker  } = require('electron');
let tray;
let sessionActive = false;
let sessionEndTime;
let powerSaveId;
And now we can define a startSession function that calls the command to prevent the laptop from sleeping. This function will take
one argument, durationInMinutes, which will be the duration of the session we want to start. In the function we will call the
powerSaveBlocker's start method with the value 'prevent-display-sleep' as the type:
//main.js

function startSession(durationInMinutes) {
  powerSaveId = powerSaveBlocker.start('prevent-display-sleep');
}
In this function, we also want to update our sessionActive variable to true and update the sessionEndTime variable to the current time plus the session duration. We can do this by adding the following to our startSession function:
//main.js

function startSession(durationInMinutes) {
  powerSaveId = powerSaveBlocker.start('prevent-display-sleep');
  sessionActive = true;
  sessionEndTime = new Date(Date.now() + durationInMinutes * 60000);
  updateTrayMenu();
}
Now that we have a function to start a new session, we can update our updateTrayMenu function to call startSession when the user clicks a button in the menu.
To do this, I am going to define a submenu function that adds options to start a new session that is 5 minutes, 30 minutes or 60 minutes long:
function buildSessionSubMenu() {
  return Menu.buildFromTemplate([
    { label: '5 minutes', click: () => startSession(5) },
    { label: '30 minutes', click: () => startSession(30) },
    { label: '60 minutes', click: () => startSession(30) }
  ]);
}
And then we can update our updateTrayMenu function to include the submenu:
function updateTrayMenu() {
  let menuTemplate;

  if (sessionActive) {
    menuTemplate = [{ label: `Time Left:`, enabled: false }];
  } else {
    menuTemplate = [{ label: 'Start New Session', type: 'submenu', submenu: buildSessionSubMenu() }];
  }

  const contextMenu = Menu.buildFromTemplate(menuTemplate);
  tray.setContextMenu(contextMenu);
}
We can also update the active session menu now to include the time left in the session. To do this, I am going to create a new function that calculates the time left in minutes and seconds and displays it as a string:
  function timeLeftString() {
  const timeLeft = sessionEndTime - new Date();
  const minutesLeft = Math.floor(timeLeft / 60000);
  const secondsLeft = Math.floor((timeLeft % 60000) / 1000);

  return `${minutesLeft}m ${secondsLeft}s remaining`;
}
And then we can update our updateTrayMenu function to include the time left in the session:
//main.js

function updateTrayMenu() {
  let menuTemplate;

  if (sessionActive) {
    menuTemplate = [{ label: `Time Left: ${timeLeftString()}`, enabled: false }];
  } else {
    menuTemplate = [{ label: 'Start New Session', click: () => startSession(30) }];
  }

  const contextMenu = Menu.buildFromTemplate(menuTemplate);
  tray.setContextMenu(contextMenu);
}
At this point, we should be able to run the application by running npm start . If everything is working, you should see your icon in the top menu bar in your Macbook, and when you click the icon you should see a selectable field that says "Start New Session".
When you click it you should see a submenu with options to start a new session that is 5, 30 or 60 minutes long.
Additionally, if you click one of the options to start a new session, this should start a new session, and you should see the tray menu change to the active session menu.
Ending Session & Countdown Timer
And just like that we are now able to start a new session to keep our Macbook awake! However our simple app is missing two things. We need to add the ability to stop the session, and we need to make the countdown timer in the active session menu actually work. As you can see in the example above, when I re-open the tab the second time, the time left in the session is not updating.
So first, let's add a new endSession function that we can call when the session ends.
This function will stop the powerSaveBlocker using the id we assign to our powerSaveId variable when we start a session, update the sessionActive variable to false, and update the Tray menu:
//main.js

function endSession() {
  powerSaveBlocker.stop(powerSaveId);
  sessionActive = false;
  updateTrayMenu();
}
Next, I am going to create a startTimer function that will update the tray menu every second to show the time left in the session. This function will use the setInterval method to call the updateTrayMenu function every second while there is time left in the session.
Once the session ends, we will call the endSession function and clear the interval:
//main.js

function startTimer() {
  const intervalId = setInterval(() => {
    if (new Date() > sessionEndTime) {
      endSession();
      clearInterval(intervalId);
    } else {
      updateTrayMenu();
    }
  }, 1000);
}
And finally, I am going to update the startSession function to call startTimer when a new session is started:
//main.js

function startSession(durationInMinutes) {
  sessionActive = true;
  sessionEndTime = new Date(Date.now() + durationInMinutes * 60000);
  powerSaveId = powerSaveBlocker.start('prevent-display-sleep');

  startTimer(); // Start the timer to update the remaining time

  // Update the tray menu immediately
  updateTrayMenu();
}
So with these changes, here is what my full main.js file looks like:
// main.js

const { app, Tray, Menu, powerSaveBlocker  } = require('electron');
let tray;
let sessionActive = false;
let sessionEndTime;
let powerSaveId;

function buildSessionSubMenu() {
  return Menu.buildFromTemplate([
    { label: '5 minutes', click: () => startSession(5) },
    { label: '30 minutes', click: () => startSession(30) },
    { label: '60 minutes', click: () => startSession(30) }
  ]);
}

function timeLeftString() {
  const timeLeft = sessionEndTime - new Date();
  const minutesLeft = Math.floor(timeLeft / 60000);
  const secondsLeft = Math.floor((timeLeft % 60000) / 1000);

  return `${minutesLeft}m ${secondsLeft}s remaining`;
}

function updateTrayMenu() {
  let menuTemplate;

  if (sessionActive) {
    menuTemplate = [{ label: `Time Left: ${timeLeftString()}`, enabled: false }];
  } else {
    menuTemplate = [{ label: 'Start New Session', type: 'submenu', submenu: buildSessionSubMenu() }];
  }

  const contextMenu = Menu.buildFromTemplate(menuTemplate);
  tray.setContextMenu(contextMenu);
}

function startSession(durationInMinutes) {
  sessionActive = true;
  sessionEndTime = new Date(Date.now() + durationInMinutes * 60000);
  powerSaveId = powerSaveBlocker.start('prevent-display-sleep');

  startTimer(); // Start the timer to update the remaining time

  // Update the tray menu immediately
  updateTrayMenu();
}

function startTimer() {
  const intervalId = setInterval(() => {
    if (new Date() > sessionEndTime) {
      endSession();
      clearInterval(intervalId);
    } else {
      updateTrayMenu();
    }
  }, 1000);
}

function endSession() {
  powerSaveBlocker.stop(powerSaveId);
  sessionActive = false;
  updateTrayMenu();
}

app.whenReady().then(() => {
  tray = new Tray('icon.png');
  updateTrayMenu();
});
Now if you start the app again and start a new session, you should see the time left in the session updating every time you re-open the tray menu, and when the session ends the session should stop and the tray menu should update to show the "Start New Session" option again.
Conclussion
And that's it! We now have a simple tray application that we can use to keep our laptop awake. In the next part, we will build a browser window based application that we can customize to add things like user input to extend the session, and a real-time countdown timer.
If you want to see the full code for this project, you can find it on my Github.