Creating Vintage Video Filters With FFmpeg
Since quarantine started, I've been having a lot of fun experimenting with FFmpeg. One idea in particular that I've wanted to try for a while is to see if I could use FFmpeg to create vintage camera filters. Something that could take a video filmed today and make it look like it was filmed in the 1970's or 1980's.
I don't have any background experience in film, photography, video editing, or video engineering. At the beginning of this project I didn't know what luma and chroma meant. I still don't, but I didn't at the beginning of this project either.
Anyways, if that lack of credentials didn't scare you away, let's dive in to building some vintage camera filters with FFmpeg. Before we get started, let's look at some of the results I've managed to get so far.
In each demo below, you can slide to the right to see the filtered version, slide to the left for the original:
Demo #1
Demo #2
Demo #3
At a high level, here are the basic steps I'm doing currently to get the results in these videos:
- Adjusting colors using curve files and/or LUTs
- Adjusting the fps
- Adding noise
- Applying blur effects
- Optionally applying any additional filters and effects
- Adding overlays for things like film dust, scratches, vhs glitches, etc.
Below I'm going to cover each of these in more detail, and then we'll look at some real examples using FFmpeg.
Coloring Videos with Curve Files and LUTs
I've had a few big aha moments throughout this experiment. One was when I realized for the first time that you can create and export color settings from Photoshop and LightRoom and then use those with FFmpeg. This can be done using Curve files and Lookup Tables (LUTs).
I didn't know what curves or LUTs were when I started this project, so it's worth taking a moment here to explore these in more details.
Curve Files
Curve files (.acv) store information on rgb color settings. These can be created in Photoshop, exported to your files, and then applied to images and videos with FFmpeg using curves=psfile=path/to/your/file.acv.
Here's an example of what an FFmpeg command might look like for this:
ffmpeg -i input.mp4 -vf curves=psfile=path/to/your/file.acv output.mp4
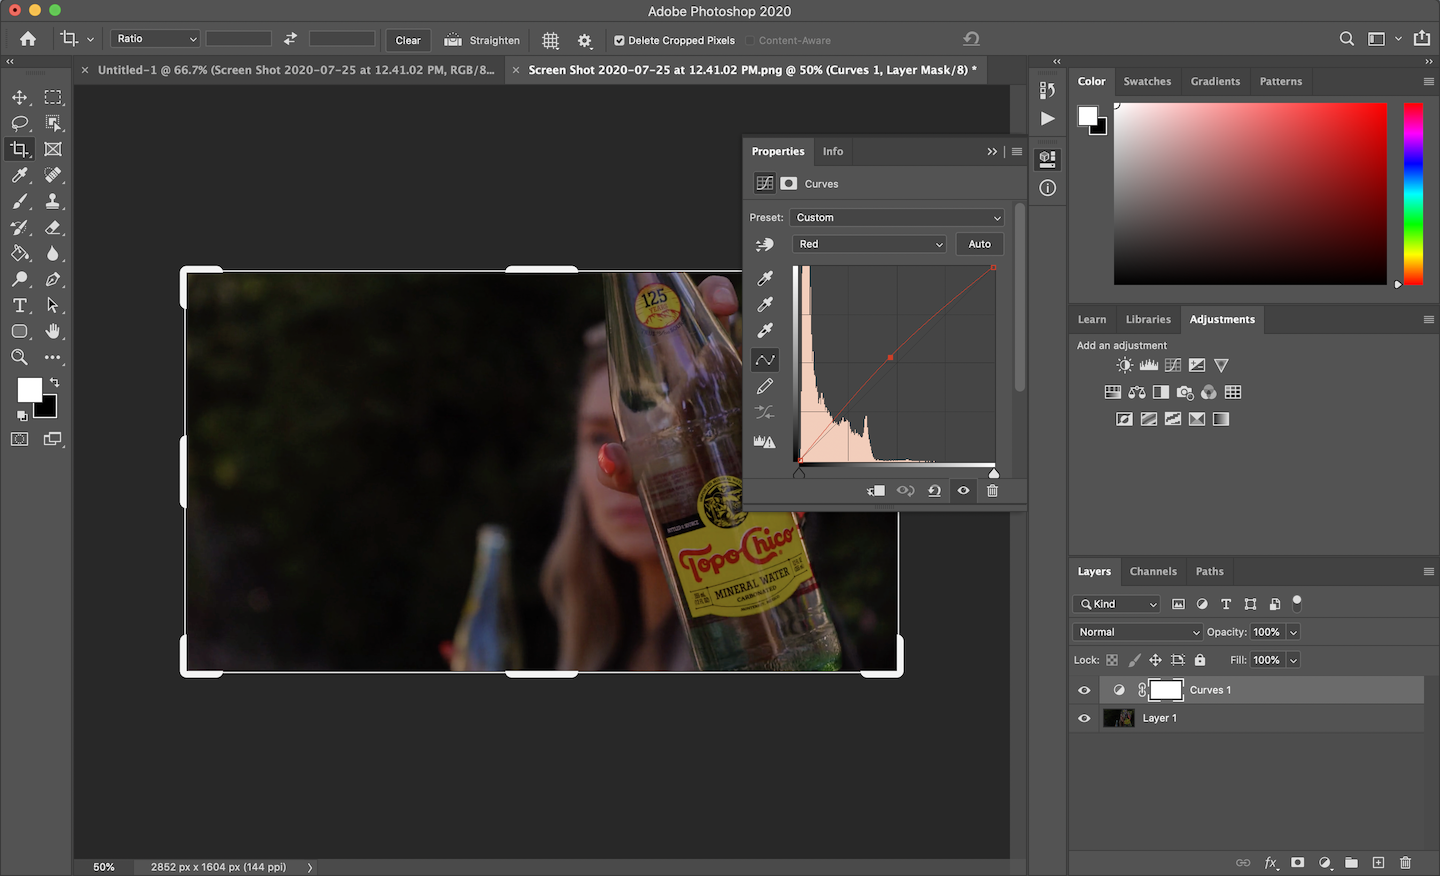
To create a curve file in photoshop, go to Layers > New Adjustment Layer > Curves.

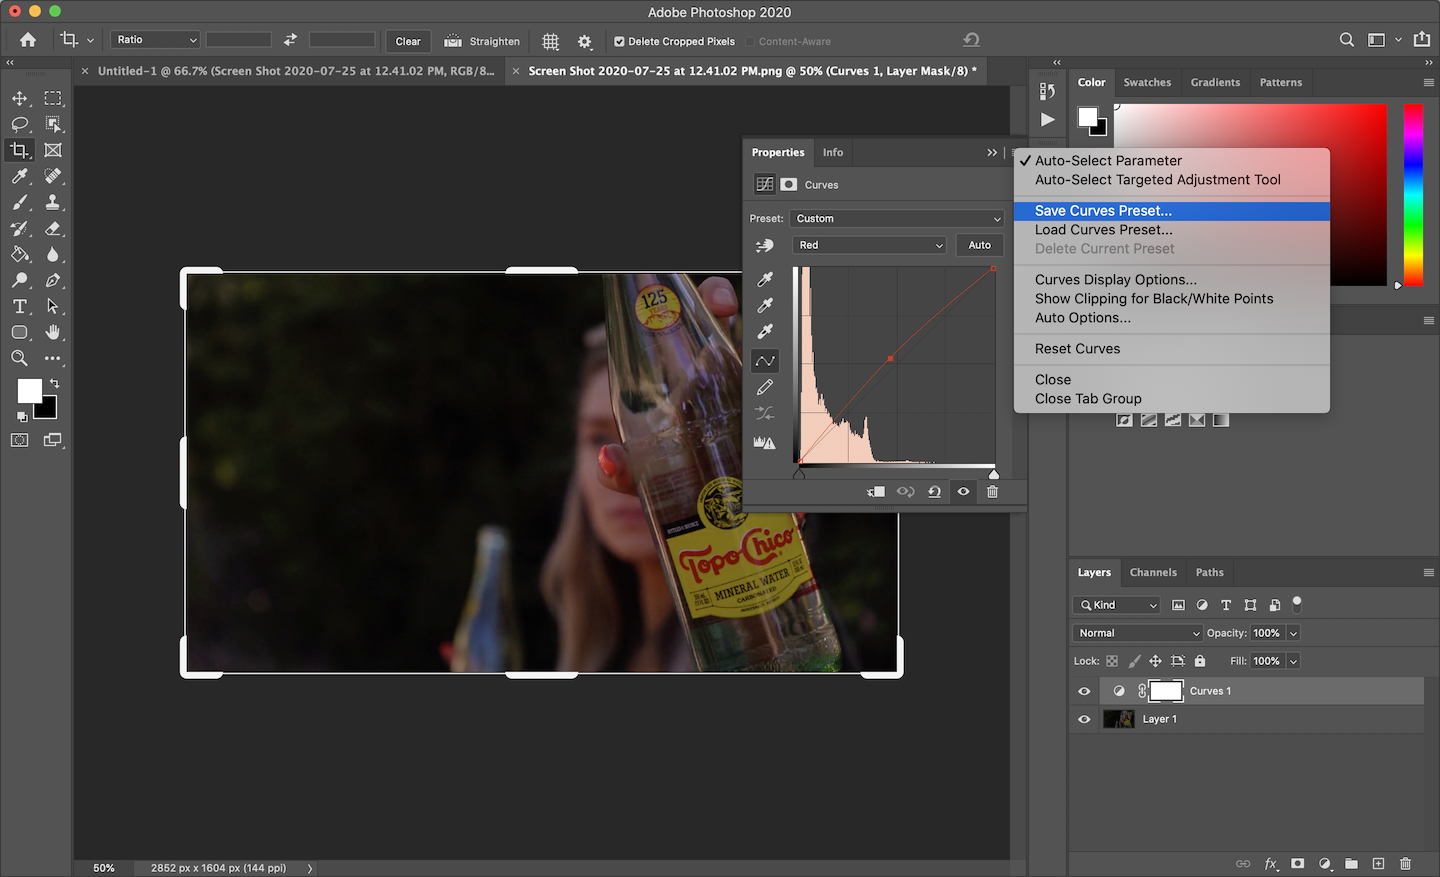
Then you can tweak the color settings to your preference and export your new curve file as a saved preset.
You can actually create curve settings directly in your FFmpeg command without using a curve file, so you don't necessarily need photoshop for this. Here's an example of what that might look like:
ffmpeg -i input.mp4 -vf curves=blue='0/0 0.5/0.58 1/1' output.mp4
For me, being able to actually adjust the x and y coordinates on a graph in photoshop and see how it impacts the color settings is crucial.
So yeah, curves are awesome. Before learning about curve files, I was trying to manipulate color settings manually just using filters like colorbalance and it would usually end up turning into a mess.
Lookup Tables (LUTs)
Lookup Tables are another way of storing color information in a file, and can be used for color correcting and color grading videos. Like curves, these can have a dramatic impact on how the final video ends up looking. Applying a LUT file to your video with FFmpeg is easy, and can be done with the lut3d filter:
ffmpeg -i input.mp4 -vf lut3d=file=path/to/your/lut.cube output.mp4
Let's take a look at a quick example. In the demo below, the only difference between the two videos is that I've applied a LUT to one using the above FFmpeg command with a preset created in LightRoom. Slide right to see the edited version with the LUT, left for the original:
But how do you create LUTs?
Creating LUTs with Adobe LightRoom
If you have access to LightRoom, there are a few steps you can follow to create LUT files with your own color settings. From what I've been able to figure out so far, this isn't as straight forward as simply exporting the settings to a LUT file unfortunately; but getting there isn't horribly complicated.
What you can do is basically create what is called a Hald image file, which will look something like this:
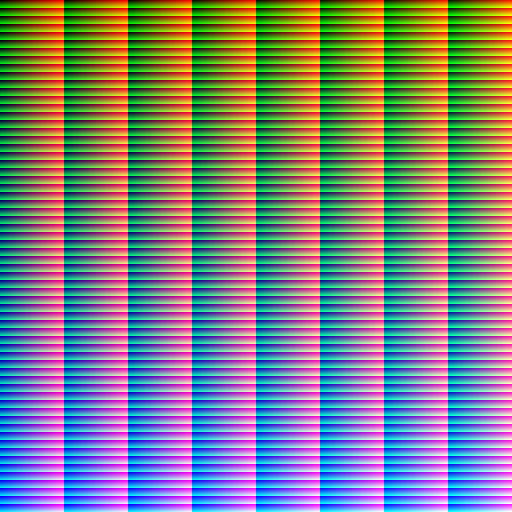
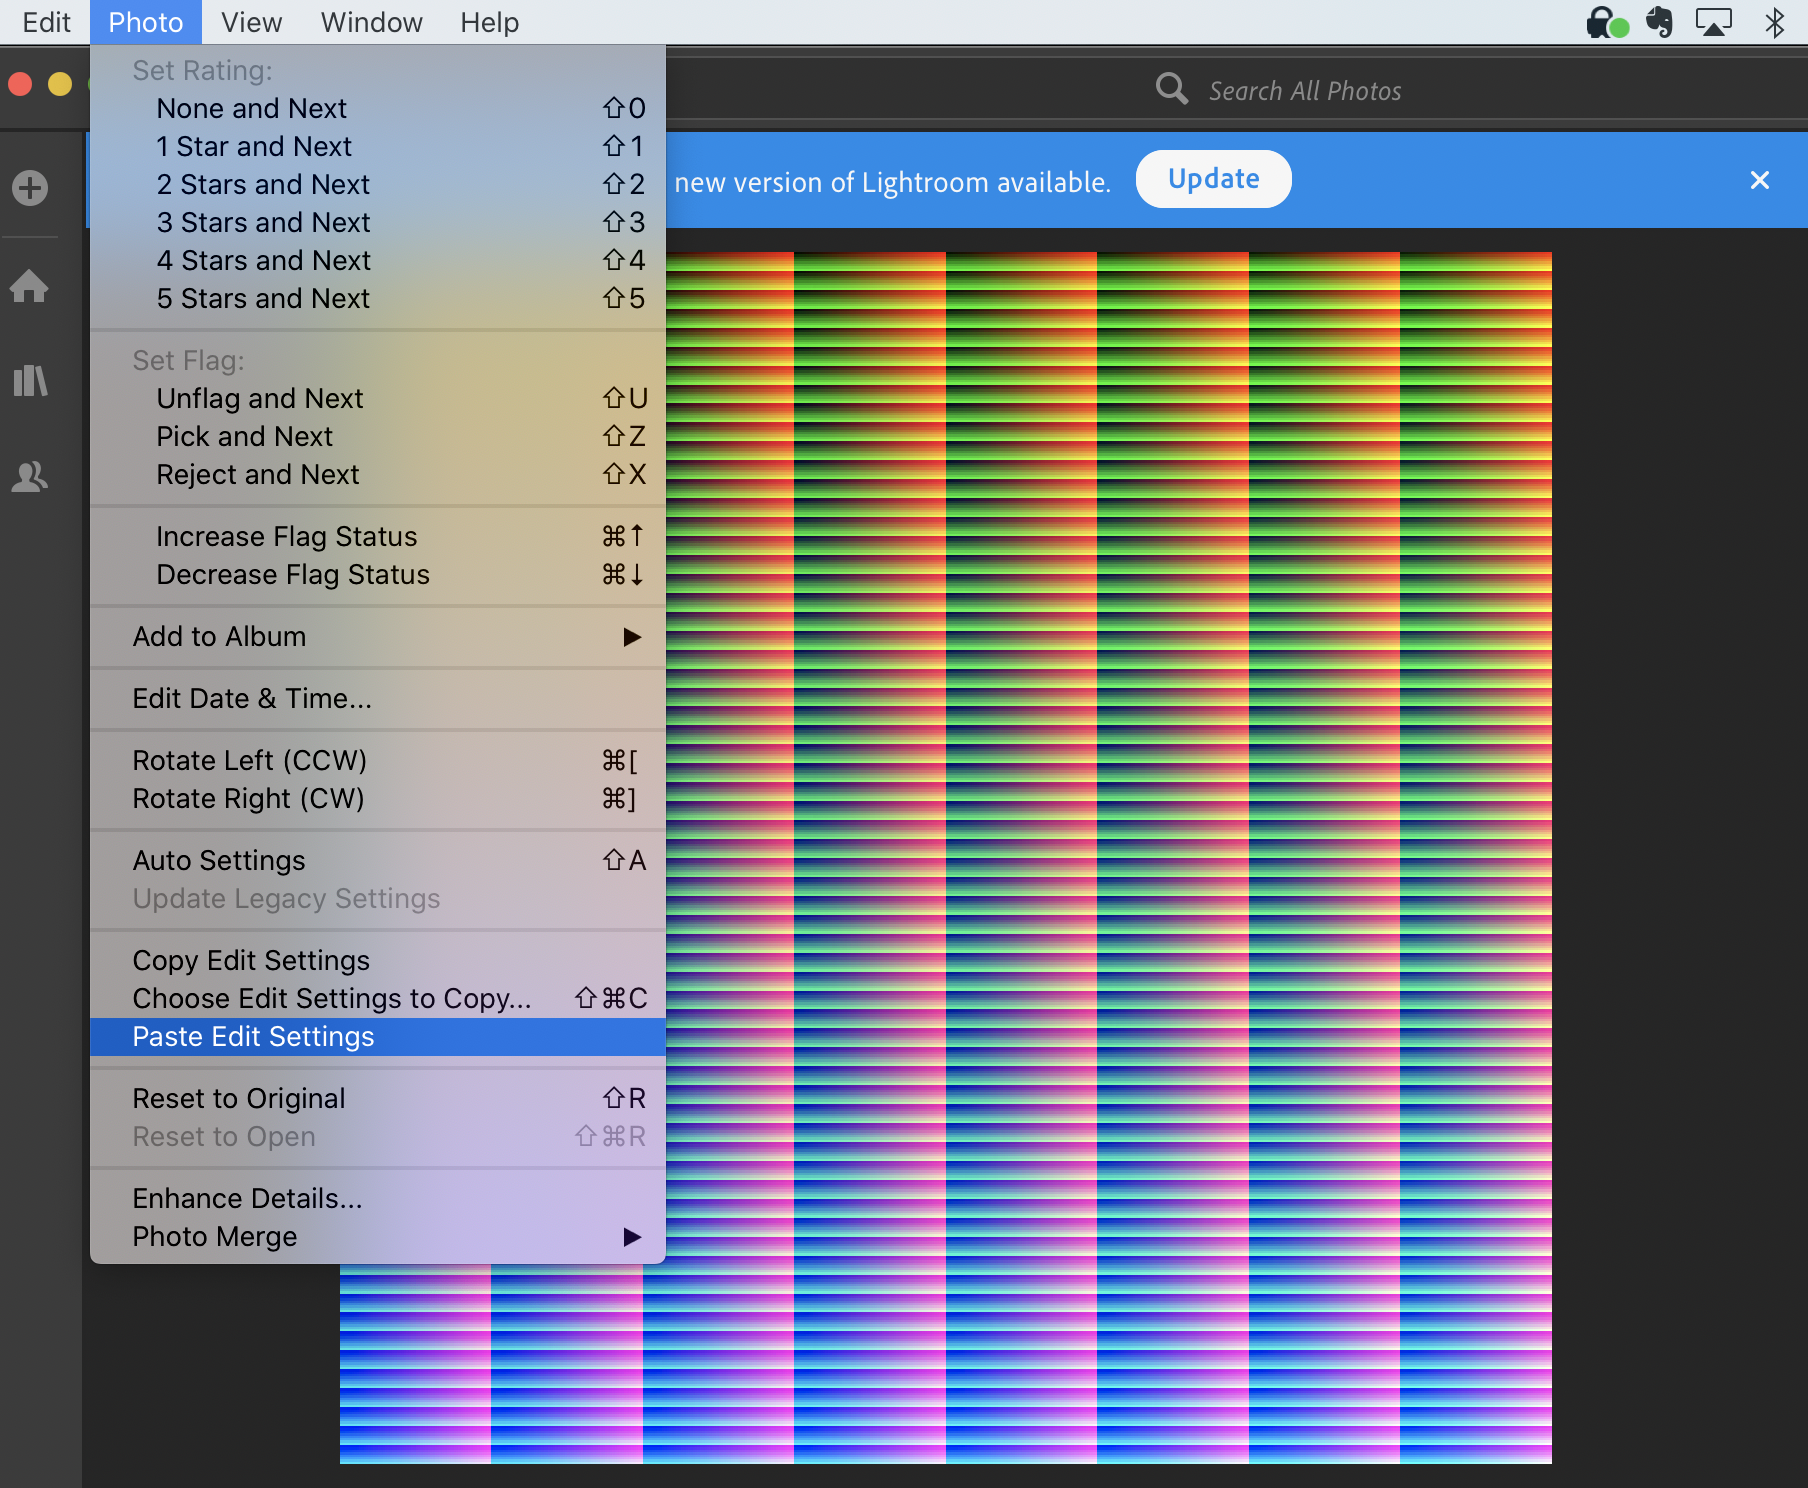
Then you can import the Hald image into LightRoom, apply your color settings onto it, and export it. To do this you can select a photo in LR with your color settings and choose Photo > Choose Edit Settings to Copy.

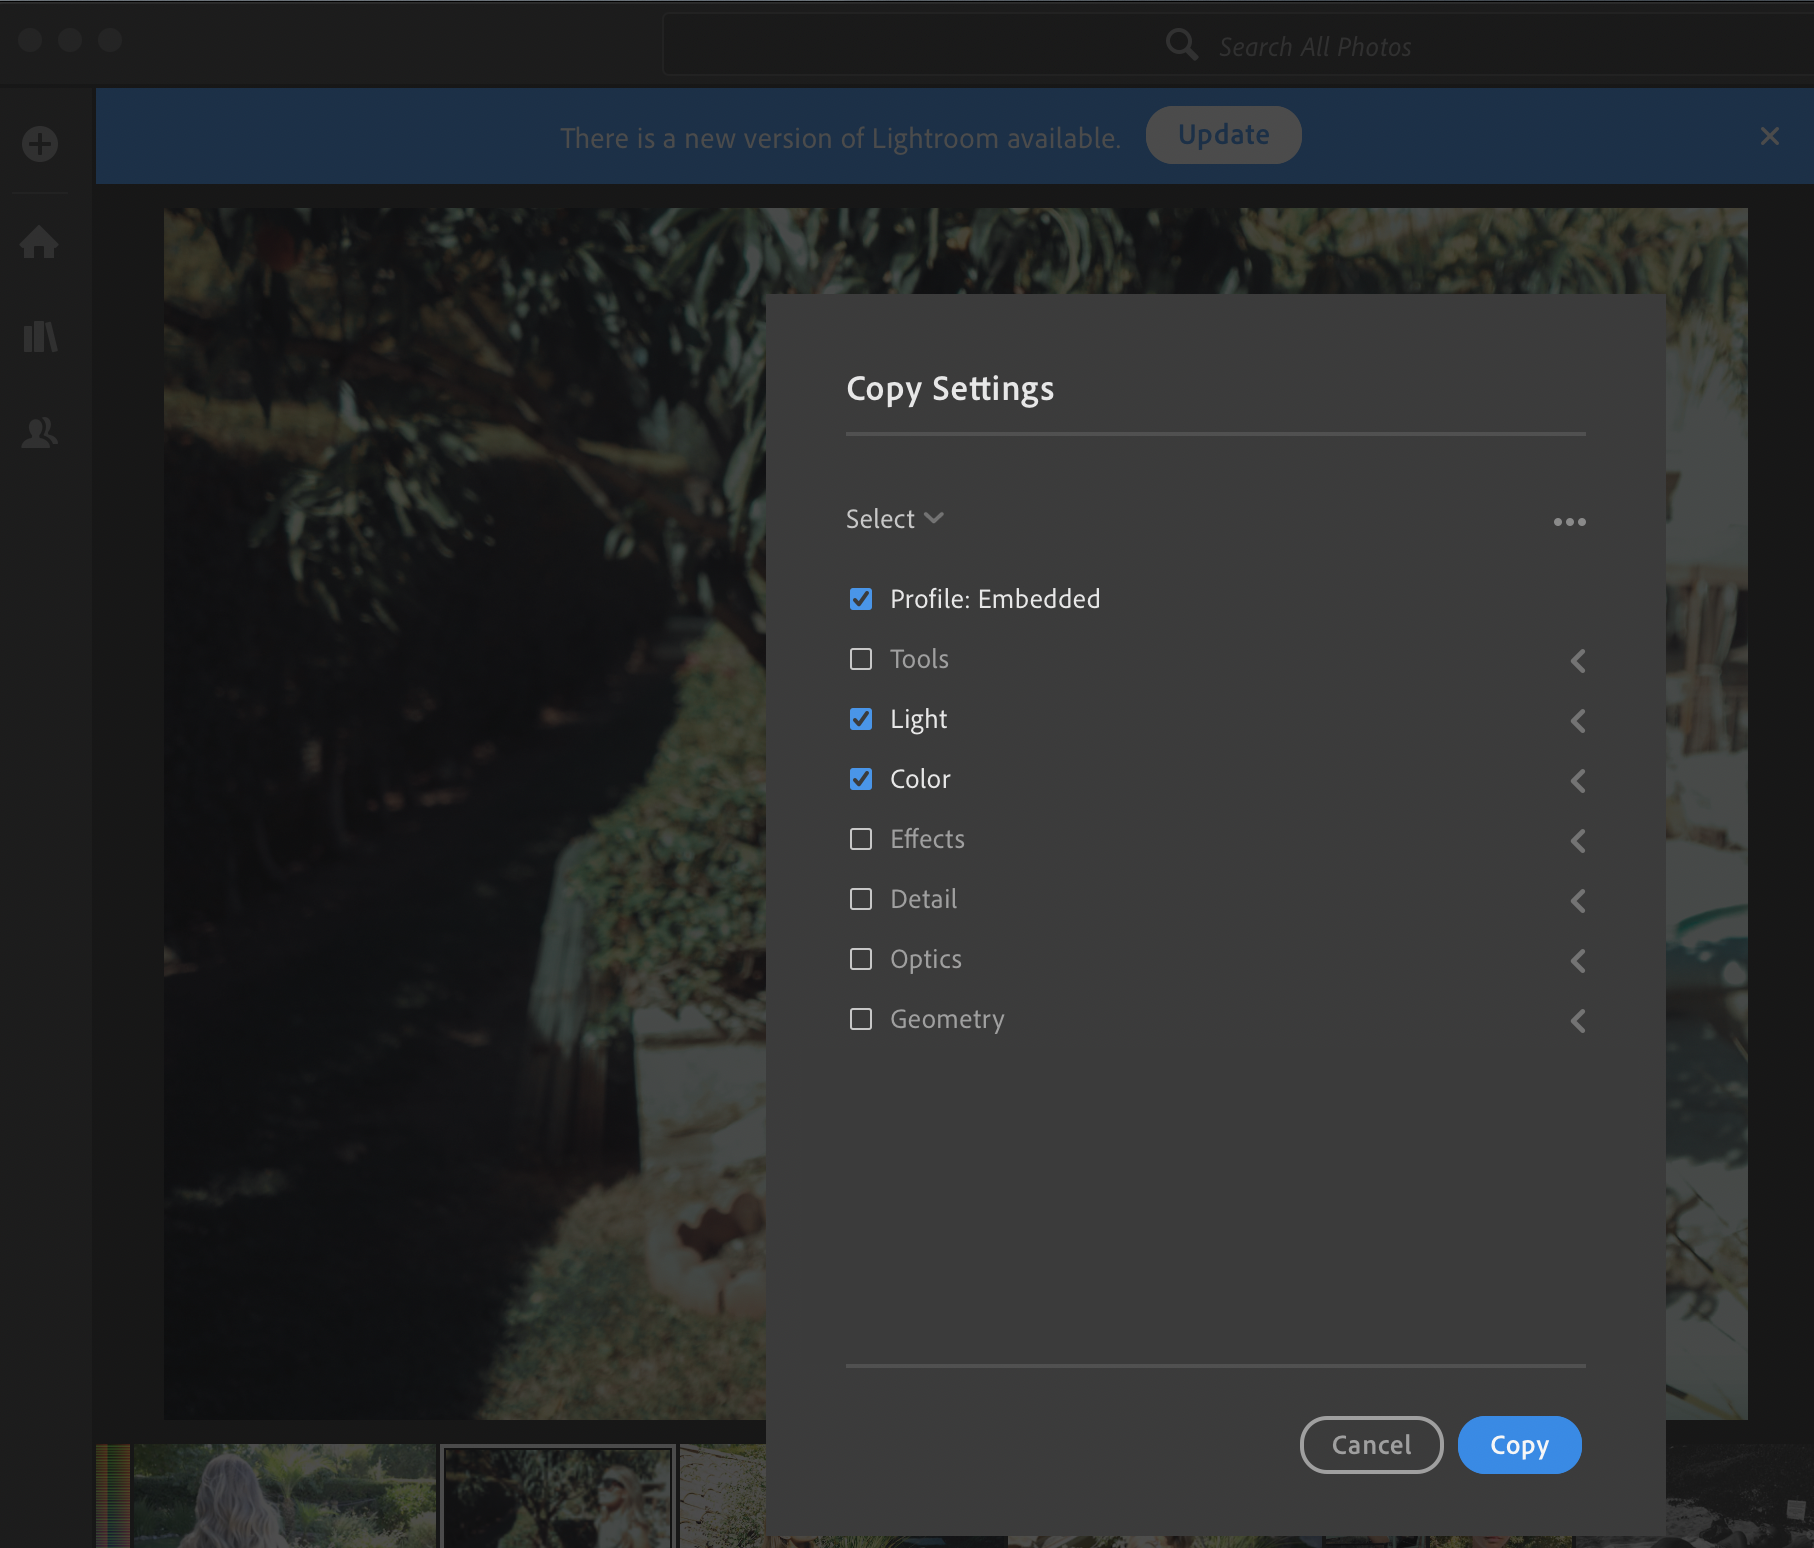
When choosing the settings to copy over, make sure to uncheck non-color settings (For example you can uncheck effects and details, which add things like grain and vignette):
Then you can open your Hald image in LightRoom and paste your color settings onto it:
Then simply export the edited image. From there you will need to convert the image into a LUT file (this will have a .cube or .3dl extension)
In order to do all of this, I wrote a small program in ruby that I'm using to generate hald images as well as convert images into 3d lookup tables. If interested, you can grab my script for this from my github here. Here is a simple example of how to use it:
require'./lut_generator'
# Create a new 512x512 hald.jpg image file. This is the file you will add your color settings to.
LutGenerator.create_hald

# Create a new 3d lookup table (.cube extension) from a hald image
LutGenerator.create_lut('hald.jpg')
I was surprised that I couldn't find a simple drag and drop web tool that did this, so I' m currently building one as well that you can try out here. Here's a little sneak peek at what it looks like:
Creating LUTs with Adobe Photoshop
In addition to Adobe LightRoom color settings, you can also export Photoshop adjustment layers to LUTs, and then use them in the same way describe above. To convert your adjustment layers to LUTs, simply navigate to File > Export > Color Lookup Table.

FPS
Adjusting the fps for a video is a really easy way to enhance the effect you're going for. For example, setting fps=6 on a video will result in a cool stop motion effect:
ffmpeg -i input.mp4 -vf fps=6 -c:v libx264 output.mp4
For a vintage video feel, setting the fps to 15, 18, 24, or 30 seems to work well.
Noise
FFmpeg has a noise filter that you can use to introduce noise (think tv static or old film grain) into your videos. There's quite a bit you can customize here to get different effects. I typically will avoid setting all strength(alls) as this will introduce color into the noise, and instead use c0s as this will apparently only add noise to the luma channel (look at that I'm learning!).
You can also set different 'flags' that will adjust how the noise looks. I've been finding some nice results combining the temporal (t) and uniform (u) flags, although you can also experiment with average (a) and pattern (p) noise as well.
Here's a simple example using ffmpeg to add noise to a video only on the luma channel, using the temporal and uniform flags:
ffmpeg -i input.mp4 -vf noise=c0s=60:c0f=t+u output.mp4
Compare this to an example where we add noise to all channels:
ffmpeg -i input.mp4 -vf noise=alls=60:allf=t+u output.mp4
In the second example you can see the noise has color in it, which makes it look a little more like 90's TV static.
You can also get some interesting results combining noise with some of FFmpeg's different blur filters.
Blur
FFmpeg has multiple different blur filters you can experiment with including smartblur, unsharp and gblur(gaussian blur).
A lot of older videos tend to be blurry and out of focus, which you can try to emulate to some degree using these different blur settings. The FFmpeg documentation for these is a little lacking, so I found I had to just try a lot of different things to figure out how to use them effectively.
Here's an example of a filter I created with FFmpeg that uses subtle blurring to try to give the video an old, 1970s look (original left, edited right):
Overlays
Overlays are really great for adding in the vintage film scratches and pops that sort of bring everything together.
You can find a ton of free old film overlays on Youtube. Here's one I've been experimenting with for example:
The basic way I've been using these is by passing them as a second input into my FFmpeg command and then using -filter_complex to overlay the second video with a lower opacity on top of my first video. Here's an example command for doing this:
ffmpeg -i input.mp4 -i overlay.mp4 -filter_complex "
[1]format=yuva444p,colorchannelmixer=aa=0.25[2];
[2][0]scale2ref[2][1];[1][2]overlay
" output.mp4
Blend Modes
In addition to overlay, if you look at FFmpeg's blend options, there are several diferent ways you can try to experiment with blending videos together.
Here's an example command combining an overlay with your base video using blend mode set to 'overlay' instead:
ffmpeg -i input.mp4 -i overlay.mp4 -filter_complex "
[1]format=yuva444p[2];
[2][0]scale2ref[2][1];[1][2]blend='overlay'
" output.mp4
If you're trying to overlay something like old film scratches or dust (see the example youtube video above), setting the blend mode to 'screen' works really well to isolate what you want to add without adding the black background from the overlay onto your base video.
Here's an exaggerated example using FFmpeg's blend mode set to screen to add film scratches to a video:
ffmpeg -i input.mp4 -stream_loop -1 -i scratches.mp4 -filter_complex "
[1]format=yuva444p[2];
[2][0]scale2ref[2][1];[1][2]blend='screen'
" -t 7 output.mp4
Syncing Your Video Duration with Overlay Videos
One thing to watch out for is that your overlay video may not be the same duration as the underlying video. This can result in either the video ending and the overlay continuing to play for a while on the last frame which looks wierd, or the opposite where the overlay stops before the video is done.
One solution I've been using for this that seems to work pretty well is to use a combination of -stream_loop and -t.
Basically, you can get the duration of the base video using ffprobe, then use -stream_loop -1 to loop the overlay video infinitely, while also using -t before the output to ensure it will only be as long as the duration of the base video. Here's an example:
DURATION="$(ffprobe -i input.mp4 -show_entries format=duration -v quiet -of csv='p=0')"

ffmpeg -i input.mp4 -stream_loop -1 -i overlay.mp4 -filter_complex "
[1]format=yuva444p,colorchannelmixer=aa=0.1[2];
[2][0]scale2ref[2][1];[1][2]overlay
" -t $DURATION output.mp4
source
Chromakey
In some cases, you may want to use only parts of an overlay. As an example, let's take this super8 film matte:
How can you overlay the parts you want onto your video without including the green screen?
One way that I've found to work decently well for this is using FFmpeg's chromakey filter. With this filter, we can target a specific color in the overlay video that we want to "cut out", effectively making it transparent for our purposes.
Here's an example removing the green screen from the video above, and using it as an overlay:
ffmpeg -i input.mp4 -stream_loop -1 -i overlay.mp4 -filter_complex "
[1]chromakey=0x00a35b:blend=0:similarity=0.15[2];
[2][0]scale2ref[2][1];[1][2]overlay
" -t 10 output.mp4
In this example, I'm using chromakey to target the green in the overlay and remove it from the video, basically making that section of the video transparent. I'm setting the chromakey value to 0x00a35b because the green in the video has a hex value of 00a35b. The purpose of the 0x prefix is to specify that the value is hexadecimal. The similarity parameter basically determines how closesly we want to target the exact color specified vs similar colors to it. Here are the results from this command:
rgbashift
This one is pretty awesome. I spent a while trying to figure out how to do this manually before I realized it was a built in filter in ffmpeg.
With the rgbashift filter, you can offset the red, green and/or blue colors in your video by a specified number of pixels horizontally or vertically. This is great for creating retro vhs effects.
Here's a really simple example using it to shift the reds horizontally -6 pixels and the greens horizontally +6 pixel:
ffmpeg -i input.mp4 -c:v libx264 -vf rgbashift=rh=-6:gh=6 -pix_fmt yuv420p output.mp4
Deshake
ffmpeg has a deshake setting that supposedly applies camera stabilization. From my experience so far, it seems to almost always do the opposite and actually makes the footage slightly more glitchy and warped. This can actually add a pretty cool enhancement though for the purposes of creating vintage filters, along with things like fps adjustments.
ffplay is your friend
If you want to quickly see the difference between a small tweak to a parameter (e.g. saturation=1.2 vs saturation=1.1), creating and exporting a new video every single time can be really time consuming. One thing you may want to do is use ffplay to quickly see changes without actually creating a new video. Here's a simple example:
ffplay -i input.mp4 -vf eq=saturation=1.2
This will open up a new window with your video playing with the effects applied. The playback rate can be a little dodgy, but unless you're trying to test something like fps adjustments it should work alright.
Conclussion
This is still an early experiment, but I'm pretty excited with the results I've managed to get so far. I'll be posting some follow ups to this soon where I'll dive into creating specific filters more in depth as well.
Also, as I mentioned above, I have virtually zero background in film or video, so any feedback on how I can improve these results is more than welcome!