Converting Images to Lookup Tables (LUTs) with Ruby
A few months ago I shared a post on some of the techniques I've been using to create vintage video filters with FFmpeg. In that post I mentioned that I wrote a small ruby program to convert images into 3d lookup tables (LUTs). These LUT files can be used to dramatically alter the colors of videos and images, and are a really nifty way to add things like vintage or cinematic effects.
In this post, I want to go into a little more detail on the process of converting these images, how my ruby script for this works, and how you can use this to color your own videos and photos. All of my code for this is available on my github here.
Background and Use Case
Here is a quick recap of my basic use case, which mainly revolves around using Adobe Lightroom and FFmpeg. Lightroom is an app that allows you to import images, and then apply various color adjustments and effects to them:
You can export an image from Lightroom with these color adjustments, and you can also copy your color and effects settings from one image to the next, as well as save your color settings as templates within Lightroom. However, as far as I am aware, there is not an easy way to export those templates from Lightroom in a reusable format that can then be applied to other things like video. This is where things get interesting.
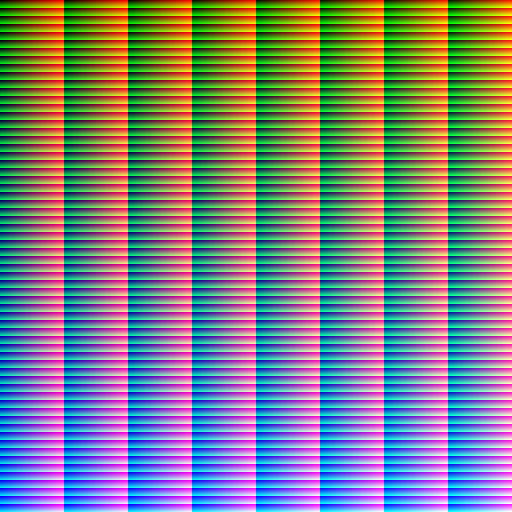
What you can do for starters, is generate something called a HALD image. There are a few different ways to get your hands on one of these, the easiest is probably just using imagemagick to create one from your command line like so:
convert hald:8 hald.jpgThe resulting image you get from running this command should look something like this:
Once you have that HALD image, you can import it into Lightroom like you would any other image, apply your color settings to it, and then export the image with the applied color settings.
Once you have the edited image, you now have a stored version of your color settings from Lightroom, and you can use that to color videos - you just need to convert it to a useable format first.
Lookup Tables and FFmpeg
This is where lookup tables and FFmpeg come in. FFmpeg can be used to apply the colors from your Lightroom template to videos and images, using a lookup table. Here's an example of a basic FFmpeg command using a lookup table to adjust the colors of a video:
ffmpeg -i input.mp4 -vf lut3d=file=path/to/your/lut.cube output.mp4So, what is needed then, is a way to convert the image with your Lightroom settings into a lookup table so that it can be used with FFmpeg.
Creating Lookup Tables from Images
This conversion from the image with the color settings into a 3d lookup table representation is the peice that my ruby program handles. I was not very familiar with lookup tables prior to working on this, but as it turns out the basic process for this conversion is not too tricky.
My script takes the path to an image file as its input, and then, using imagemagick, maps over each pixel in the image. For each pixel, we get the r, g, and b values, and then convert each from the 0-255 scale into a value on a 0.0-1.0 scale.
A couple of interesting things come up here. For one, RMagick defaults the image depth to 16 instead of 8, which means each individual rgb value is between 0-65535 instead of the 0-255 scale we would get with depth 8. So before handling the 0.0-1.0 scale conversion, first my script divides the initial value we get by 257 to try to get the depth 8 value, and then divides the result from that again by 255 to adjust to a 0-1 scale.
    # Once we have converted the values to depth 8, the range for each individual colour
    # is 0-255 (2^8 = 256 possibilities).
    # We can divide each value again by 255, so that the 0-255 range can be described
    # in a 0.0-1.0 range.
    #
    # @param colors [Array] depth 16 rgb colors
    #
    # @return [Array]
    def rgb_map(colors)
      colors.map do |color|
        (color / 257.0).round.then do |depth_8|
          (depth_8 / 255.0).then(&method(:format_numbers))
        end
      end
    end
Dividing twice here is somewhat unnecessary. The program doesn't need to do anything currently with the depth 8 value, so you could just divide the initial value once by 65535. I think I did this in two steps initially just because I'm more used to seeing rgb values on the 0-255 scale, so it was nice for debugging purposes.
Anyways, with that conversion, my script will create a new row for each pixel with the resulting values and add it to a table that makes up the majority of the new LUT file being created. The only other thing in the file are headers, which are a mix of hardcoded values and a few values that are calculated based on the dimensions of the input image. Here's an example of what a portion of a generated LUT file might look like:
TITLE "Your Title"
LUT_3D_SIZE 64
DOMAIN_MIN 0.0 0.0 0.0
DOMAIN_MAX 1.0 1.0 1.0
0.000000 0.000000 0.000000
0.000000 0.000000 0.000000
0.000000 0.000000 0.000000
0.000000 0.000000 0.000000
0.000000 0.000000 0.000000
0.015686 0.000000 0.003922
0.031373 0.000000 0.007843
0.043137 0.003922 0.007843
0.066667 0.003922 0.007843
So that is basically what is happening under the hood. Once you have the generated LUT file, you can now use it to apply your color settings from Lightroom to any video or image that you want.
Example
So now, let's look at an example, using the FFmpeg command mentioned above, as well as a LUT file that has been generated using my script, to colorize a video. First, here is the original, unedited video:
Next, here is the FFmpeg command that takes this video and the LUT file as inputs:
ffmpeg -i input.mp4 -vf lut3d=file=zayne-lut.cube output.mp4And finally, here is the resulting output video we get:
As you can see, the color adjustments you can get with these LUT files can have a dramatic impact!
What About Using Other Images?
If you're like me, you might be curious to know - what happens when you convert something other than a HALD image into a LUT file and apply it to a video? Well, it doesn't look great. Here's an example using the movie poster from Once Upon a Time in Hollywood:

Using my program, I converted this image into a LUT file, and then applied it to the same video used in the example above using FFmpeg; here are the results:
Note: In this example I sped up the video dramatically to reduce the file size, but you get the idea.
Conclussion
Again, my personal use case for this is to convert Lightroom color settings to LUTs and use them to color videos using FFmpeg, but I think there are additional use cases for this as well. For example, I believe you can import LUT files into Adobe Premiere and use them in a similar manor.
If you are not eager to dive into code but would like to try out this converter, I created a drag-n-drop web version of this that you can try out here. Again, all of the code for this is available on github here.